
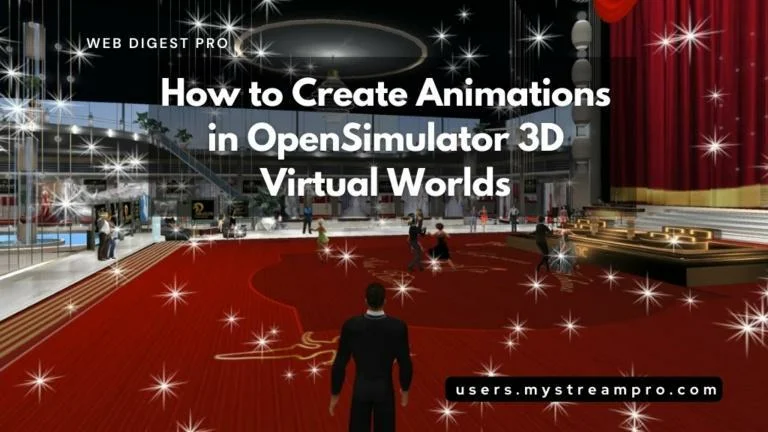
OpenSimulator, or OpenSim for short, is an open-source highly customizable platform for building virtual digital spaces. Users can create their 3D environments, build up structures, and script interactions. However, one of the most powerful ways to enhance the user experience is through animations. Whether you want to animate an avatar’s gestures, create complex object movements, or design interactive scenes, learning how to create and implement animations in OpenSim becomes quite essential.
This tutorial will take you through the whole process, from basic utilities and techniques to advanced tips and troubleshooting, concerning the creation of animations in OpenSimulator. By the end of this article, you will be pretty well equipped at bringing your virtual world into life in a dynamic and engaging manner.
Table of Contents
- Understanding OpenSimulator and Its Animation Capabilities
- Setting Up Your Animation Tools
- Creating Avatar Animations
- Animating Objects in OpenSimulator
- Advanced Animation Techniques
- Tips and Best Practices for Effective Animations
- Conclusion and Next Steps
1. Understanding OpenSimulator and Its Animation Capabilities
The versatility of the platform enables unparalleled flexibility for users who want to build, script, and animate their 3d environments. Compared to other platforms, OpenSim is open-source with all that this entail. Moreover, it allows for extensive customization, including the ability to create and upload custom animations for avatars and objects.
Animation Capabilities in OpenSim:
- Customizable Avatars: Users can create and upload animations that allow avatars to perform various actions, from simple gestures like waving to complex sequences like dancing or interacting with objects.
- Scripting Support: OpenSim’s support for the Scripting Language (LSL) allows you to trigger animations based on specific events, making your virtual world more interactive.
- Compatibility with Multiple Formats: OpenSim supports several animation formats, most notably .bvh (Biovision Hierarchy), which is widely used for both human and object animations.
Why Animations Matter in OpenSimulator
Animations enhance the immersive experience. They add life to avatars, making them appear realistic and more interactive. Instead of static avatars standing in a room, animated gestures, facial expressions, and movements can make social interactions more natural and engaging.
By animating objects one can add an extra layer of dynamism to the virtual environment. Candidates include doors that open automatically when approached, vehicles that move on roads, effects like swaying trees, etc. Such animations can make your world feel more alive.
2. Setting Up Your Animation Tools
Before you can start creating animations in OpenSimulator, you need to set up the appropriate tools. These tools include 3D modeling and animation software, OpenSimulator viewers, and file exporters.
Essential Tools for Animation in OpenSim:
- 3D Modeling and Animation Software: This is where you create the actual animations. Some popular options include:
- Blender: An open-source 3D creation suite that is widely used due to its comprehensive features and free access.
- Maya and 3ds Max: These are industry-standard tools with extensive features, but they come with a hefty price tag.
- Avastar Add-on for Blender: Specifically designed for creating animations for Second Life and OpenSim, this add-on simplifies the rigging and animation process for avatars.
- OpenSimulator Viewer: A viewer like Firestorm or Singularity is essential for testing and previewing your animations in OpenSim. These viewers allow you to interact with the virtual environment and see how your animations will appear in-world.
- File Exporters: Ensure that your animation software can export files in the .bvh format, which is compatible with OpenSim. Blender, for example, has a built-in .bvh exporter.
Setting Up Blender for OpenSim Animations
Blender is a popular choice for creating animations for OpenSimulator due to its robust features and open-source nature. Here’s how to set it up for creating animations:
- Download and Install Blender: Visit the Blender official website and download the latest version.
- Install the Avastar Add-on (Optional but Recommended): Avastar simplifies the process of creating animations for OpenSim avatars by providing pre-rigged models that match the avatar structure used in OpenSim.
- Configure Export Settings:
- Frame Rate: Set your frame rate to 30 FPS, which is the standard for OpenSim.
- File Format: Ensure that you export your animations in the .bvh format, as this is compatible with OpenSim.
By setting up Blender (or your preferred 3D modeling tool) correctly, you’ll be ready to start creating animations that can be seamlessly integrated into OpenSim.
3. Creating Avatar Animations
Animating avatars is one of the most common tasks in OpenSimulator. Whether you’re creating a simple gesture or a complex dance routine, the process involves several key steps: modeling, rigging, animating, and exporting.
Step 1: Model and Rig Your Avatar
If you’re starting from scratch, the first step is to create or import a 3D model of an avatar. Rigging involves adding a skeleton to the model, which will serve as the framework for your animations. If you’re using Blender, you can import the Avastar rig to simplify this process, as it is already configured to match the avatar structure used in OpenSim.
- Rigging: Ensure that the rig matches the OpenSim avatar structure. The rig should include all necessary bones (e.g., for limbs, head, torso) and be properly weighted so that when you move a bone, the corresponding parts of the model move appropriately.
Step 2: Animate Your Avatar
Once your avatar is rigged, you can begin animating it. This involves setting keyframes at various points in the timeline to create motion.
- Keyframing: Use keyframes to define the start and end points of a movement. For example, if you’re creating a waving animation, you would set a keyframe where the arm is at rest and another where it is raised in a wave.
- Interpolation: Blender automatically interpolates the motion between keyframes, creating a smooth transition. You can adjust the interpolation to control the speed and smoothness of the motion.
Step 3: Bake the Animation
Baking the animation ensures that all the keyframes are finalized and ready for export. This step is crucial for preventing any issues with missing or misaligned frames during playback in OpenSim.
- Baking Process: In Blender, select all bones and choose the “Bake Action” option. This process will create a keyframe for every frame of your animation, ensuring smooth playback.
Step 4: Export to .bvh Format
After you’ve created and baked your animation, it’s time to export it as a .bvh file, which is the format recognized by OpenSimulator.
- Export Settings: In Blender, go to the export options and select .bvh. Make sure the frame rate is set to 30 FPS, and choose the appropriate bones and animation length for export.
Pro Tip: Test your animation within Blender before exporting to ensure it looks as expected. Small adjustments at this stage can save you time during the import process in OpenSim.
Step 5: Importing and Testing
Once your animations are ready, the next step is to import them into OpenSimulator and test them in the virtual environment. This step is crucial for ensuring that your animations work as expected and appear smooth and natural.
Avatar Animations
- Log into OpenSim: Open your preferred viewer, such as Firestorm or Singularity, and log in to your OpenSimulator account.
- Upload the .bvh File: Navigate to the upload section in your viewer. Most viewers have an “Upload” option under the “File” menu. Select your .bvh file and upload it to your inventory.
- Assign to Avatar: Once uploaded, you can assign the animation to your avatar. This can be done by right-clicking on the animation in your inventory and selecting “Play in World” or by attaching it to an animation override (AO) HUD.
Testing Avatar Animations
After importing your animation, it’s important to test it in-world to ensure it performs as expected. Here’s how:
- Preview in Viewer: Use the preview function in your viewer to see how the animation looks on your avatar. Make sure it plays smoothly and without any glitches.
- Adjust Timing: If the animation doesn’t play as expected (e.g., it’s too fast or too slow), you may need to go back to your 3D modeling software to adjust the timing and re-export.
- Integrate with AO HUD: If you’re using an AO HUD, add your new animation to the HUD and assign it to a specific action (e.g., walking, sitting). Test the animation in various contexts to ensure it works seamlessly with other animations in the HUD.
4. Animating Objects in OpenSimulator
While animating avatars is important, animating objects can add a dynamic and interactive element to your virtual world. Whether you want to create simple movements like a rotating door or more complex sequences like flying aircrafts, object animations are essential for a fully immersive experience.
Scripting Object Animations
Object animations in OpenSim are typically controlled by scripts written in LSL Language. These scripts can trigger animations based on user interactions or other in-world events.
Example: A Theater Stage Curtain Script
1. Move the curtain
integer toggle = -1;

move(vector direction) {
    for (integer p = 0; p < 10; ++p) {
        llSetPos(llGetPos() + direction);
    }
}

default {
    touch_start(integer total_number) {
        toggle = ~toggle;
        if (toggle) {
            move(<0.59, 0, 0>);
        } else {
            move(<-0.59, 0, 0>);
        }
    }
}
2. Resize the curtain
vector gScaleLarge = <0.01000, 16.00, 15.00>;
vector gScaleSmall = <0.01000, 2.00, 15.00>;

integer gSteps = 20;
float gSwitch = 1.0;

default {
    state_entry() {
        llSetScale(gScaleLarge);
    }

    on_rez(integer x) {
        llResetScript();
    }

    touch_start(integer total_number) {
        vector ScaleStep = (gScaleLarge - gScaleSmall) / gSteps;
        vector wscale = llGetScale();
        gSwitch *= -1;

        for (integer i = 0; i < gSteps; ++i) {
            llSleep(0.1);
            llSetScale(wscale + ScaleStep * (float) i * gSwitch);
        }
    }
}
The first script simulates the movement of a theater curtain (or a similar object) in response to a touch event by toggling between two states: moving the object in one direction or the opposite direction. The toggle mechanism is implemented using the ~ (bitwise NOT) operator, which flips the bits of an integer, effectively switching between -1 and 0 with each touch. This allows the script to alternate the object’s movement back and forth along a specific axis, creating a simple yet effective animation that mimics the opening and closing of a curtain. The second script controls the resizing (shrinking and expanding) of an object in a virtual environment when it is touched. The object will change its size gradually over a set number of steps, creating a smooth transition effect.
5. Advanced Animation Techniques
Once you’ve mastered the basics of creating and importing animations, you can explore more advanced techniques to enhance your animations in OpenSimulator.
Looping Animations
Looping animations are useful for actions that repeat continuously, such as walking, running, or dancing. Creating a seamless loop requires careful planning and execution.
- Creating the Loop: When animating, ensure that the final keyframe matches the starting keyframe exactly, so the animation can loop without any noticeable jump.
- Testing the Loop: Import the animation into OpenSim and play it in a loop. Watch for any jerky movements or discontinuities, and adjust the keyframes in your 3D modeling software if necessary.
Facial Animations
Adding facial animations can greatly enhance the expressiveness of avatars. While more challenging to create, facial animations can make your avatars more lifelike and engaging.
- Rigging for Facial Movements: You’ll need to rig your avatar’s face with additional bones or blend shapes to control expressions like smiling, frowning, or blinking.
- Animating Expressions: Use keyframes to create various expressions. For example, you can create a sequence where the avatar smiles and then returns to a neutral expression.
- Combining with Body Animations: Facial animations can be combined with body movements to create more complete and expressive animations. For instance, a wave can be accompanied by a smile to make the interaction feel more friendly.
Complex Multi-Part Animations
If you’re creating animations for objects with multiple moving parts, such as vehicles or robots, you’ll need to manage each part’s animation separately.
- Synchronizing Movements: When animating multi-part objects, ensure that all parts move in a coordinated manner. For instance, when animating a robot, the arm, hand, and fingers should move together smoothly.
- Using Multiple Scripts: In some cases, you might need to use multiple scripts to control the different parts of your object. Make sure these scripts are synchronized to avoid any disjointed movements.
6. Tips and Best Practices for Effective Animations
Creating effective animations in OpenSimulator requires attention to detail and a clear understanding of how animations interact with the virtual environment. Here are some tips to help you create animations that are both engaging and efficient.
Keep Animations Simple and Efficient
- Avoid Overcomplicating: Complex animations can be impressive, but they also come with a higher performance cost. Aim for simplicity where possible, especially in environments with multiple avatars and objects.
- Optimize File Size: Large animation files can slow down upload times and cause performance issues in-world. Keep your animations short and efficient, using the minimum number of keyframes necessary to achieve the desired effect.
- Test in Various Environments: Test your animations in different in-world environments, including those with high traffic or complex builds, to ensure they perform well under various conditions.
Utilize Scripting for Interactive Animations
- Event-Driven Animations: Use LSL scripting to trigger animations based on specific events, such as avatar proximity or object interaction. This adds a layer of interactivity to your animations, making them more engaging for users.
- Randomized Animations: To create more natural-looking environments, consider using scripts that randomly trigger different animations. For example, you could create a script that randomly triggers different sitting animations when an avatar sits down.
Test Across Different Viewers
Different OpenSim viewers may render animations slightly differently, so it’s important to test your animations across multiple viewers to ensure consistency.
- Firestorm: A popular viewer with robust animation support. Test your animations in Firestorm to see how they perform under typical conditions.
- Singularity: Another common viewer. Test your animations here to ensure compatibility, especially if you’re targeting users who prefer this viewer.
- Adjust for Viewer Differences: If you notice differences in how an animation is rendered between viewers, make adjustments in your 3D modeling software and re-export the animation.
7. Conclusion and Next Steps
Creating animations in OpenSimulator is a skill that can greatly enhance the immersive experience of your virtual world. Whether you’re animating avatars, objects, or entire scenes, understanding the tools and techniques involved is key to bringing your creations to life.
As you continue to develop your skills, experiment with different types of animations and explore the possibilities offered by advanced scripting techniques. Explore the possibilities with MyStreamPro Interactive 3D Spaces to watch animations in action. More examples can be found at Expo-Host.
Subscribe to our newsletter!


+ There are no comments
Add yours